The importance of ISO in photography
ISO is an essential element of exposure in digital photography, and understanding how it works is crucial for achieving the desired results. In this article, we’ll dive into how ISO works, how to use it effectively, and some tips for getting the most out of your DSLR camera.
What is ISO?
ISO is an acronym for International Organization for Standardization, which is the global standard-setting body for various industries. In the context of photography, ISO refers to the sensitivity of the camera’s sensor to light. It is measured on a numerical scale, typically ranging from 100 to 6400 or higher, depending on the camera.
When you increase the ISO, the camera’s sensor becomes more sensitive to light, which means that it can capture images in lower light conditions. However, higher ISO settings also introduce more digital noise or grain to the image, which can reduce the overall image quality.
How to use ISO effectively in a DSLR camera
Here are some tips for using ISO effectively in a DSLR camera:
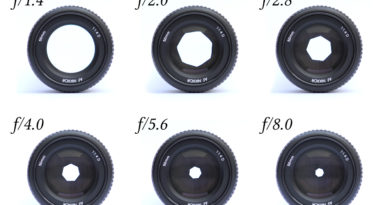
- Understand the relationship between ISO, aperture, and shutter speed: ISO is one of the three elements of exposure, along with aperture and shutter speed. Understanding how these three elements work together can help you achieve the desired exposure for your images. For example, if you’re shooting in low light conditions and want to keep your aperture and shutter speed the same, you can increase the ISO to capture more light.
- Use the lowest possible ISO for the situation: In general, it’s best to use the lowest possible ISO for the situation to minimize digital noise. Start by setting the ISO to 100 or 200 and adjust it as needed. Keep in mind that some cameras produce less noise at higher ISOs than others, so it’s important to experiment with your camera to find the optimal ISO settings.
- Consider shooting in RAW: If your camera allows it, consider shooting in RAW format, which captures more information and provides greater flexibility for adjusting exposure and reducing noise in post-processing.
- Use ISO creatively: While it’s important to use ISO to achieve proper exposure, you can also use it creatively to achieve different effects. For example, intentionally increasing the ISO to introduce grain or noise can create a gritty or vintage look in your images.
- Use auto ISO with caution: Some cameras have an auto ISO feature, which automatically adjusts the ISO based on the available light. While this can be a useful feature, it’s important to use it with caution, as it can sometimes result in images with too much noise or a lower image quality.
Conclusion
ISO is a critical element of exposure in digital photography, and understanding how to use it effectively is essential for achieving the desired results. By experimenting with different ISO settings and understanding how it works in relation to aperture and shutter speed, you can take full advantage of your DSLR camera and create stunning images in a variety of lighting conditions.

